
PNG vs SVG vs JPG: What the Difference Actually Means in Canva
PNG, SVG and JPG explained in plain language — raster vs vector, what transparency really is, and why picking the wrong one is the reason your custom frame came out as a rectangle instead of a star.
If you design in Canva for long enough, one of these will happen to you. You download a logo and it arrives with an ugly white box behind it. You upload a star to a frame app and get back a rectangle. You blow up an icon for a poster and the edges turn to mush.
All three are the same problem wearing different hats: the file format was wrong for the job.
PNG, SVG and JPG are not three flavours of the same thing. They store pictures in fundamentally different ways, and once you know which way each one works, all of those little mysteries stop being mysteries. This guide explains what each format actually is, then shows exactly where the difference bites inside Canva.
The one-line version #
| Format | What it stores | Transparency | Best for |
|---|---|---|---|
| JPG (also written .jpeg) | A grid of pixels, compressed by throwing information away | None. Ever. | Photographs, especially where file size matters |
| PNG | A grid of pixels, compressed without losing quality | Yes — full alpha, including soft edges | Logos, screenshots, cut-outs, anything that needs a see-through background |
| SVG | Instructions for drawing shapes (lines, curves, fills) | Yes | Logos, icons, lettering, cut files — flat artwork that must stay sharp at any size |
If you only remember one thing: JPG cannot be transparent. That single fact explains most of the frustration people run into.
Raster vs vector: the real dividing line #
JPG and PNG are raster formats. They describe a picture as a rectangle of coloured dots. A 500 × 500 PNG contains exactly 250,000 dots, and that is all the information there will ever be. Blow it up to poster size and the software has to invent the missing dots, which is why enlarged raster images look soft or blocky.
SVG is a vector format. It does not store dots at all. It stores something closer to a recipe: start here, curve to there, fill this area with this colour. Every time it is displayed, it is redrawn from the recipe at whatever size is needed. A 2 KB SVG logo is razor-sharp on a business card and razor-sharp on a billboard.
The catch is that a recipe only works for things that can be described as shapes. You cannot write instructions for a photograph of your grandmother — there is no "curve" in a face, just millions of subtly different pixels. So:
- Photos → raster (JPG or PNG). Always.
- Logos, icons, monograms, lettering, cut shapes → vector (SVG) if you can get it.
Transparency, and why it is not what most people think #
"Transparent background" sounds like an absence — like the background was deleted. It is closer to the opposite: it is extra information stored alongside the colour.
A PNG holds four numbers per pixel: red, green, blue, and alpha. Alpha is opacity, from fully invisible to fully solid. It is that fourth number that lets a PNG have a genuinely soft edge — the halo around a logo, the wisps at the edge of someone's hair — instead of a hard jagged cut-out.
A JPG holds three numbers per pixel. There is no fourth slot. This is not a setting you can turn on, or something a converter can fix later; the format simply has nowhere to put the information. Save a transparent image as JPG and the transparent parts are filled in — usually with white, sometimes black — permanently.
SVG handles it differently again. There is no background at all unless you draw one. Anywhere you did not put a shape is just empty.
The practical test: open the file and look at it against a dark background, or drop it onto a coloured Canva page. If a white box appears, there is no transparency — regardless of what the file is called.
Where this bites in Canva #
1. Your custom frame came out rectangular #
This is the number one support question for every frame-maker app, and it is always the same cause.
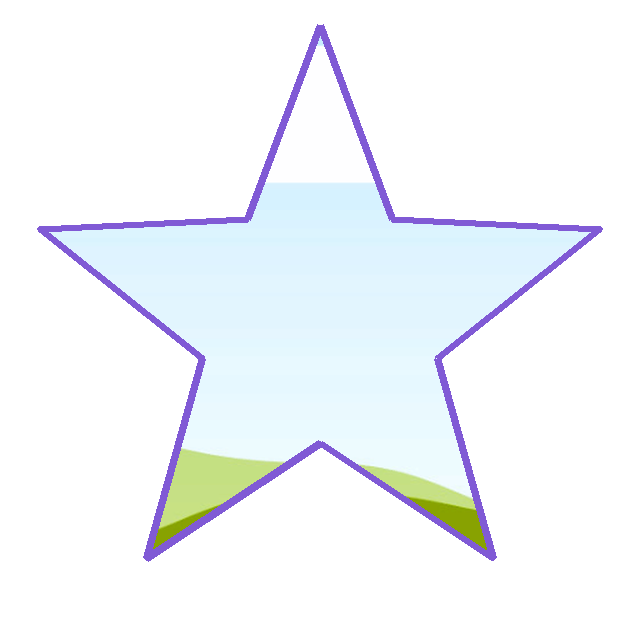
A frame is cut from the outline of the file you give it. Image to Frame accepts PNG, SVG and JPG up to 5MB per file — but if the shape you uploaded still sits on a white background, the outline is the edge of that white background. You get a rectangle, and the app did exactly what you asked.
Fix: remove the background before converting, then save as PNG or SVG. The app's own guidance says the same thing — transparent source images give the best results, and simple line shapes work better than tangled, overlapping curves.
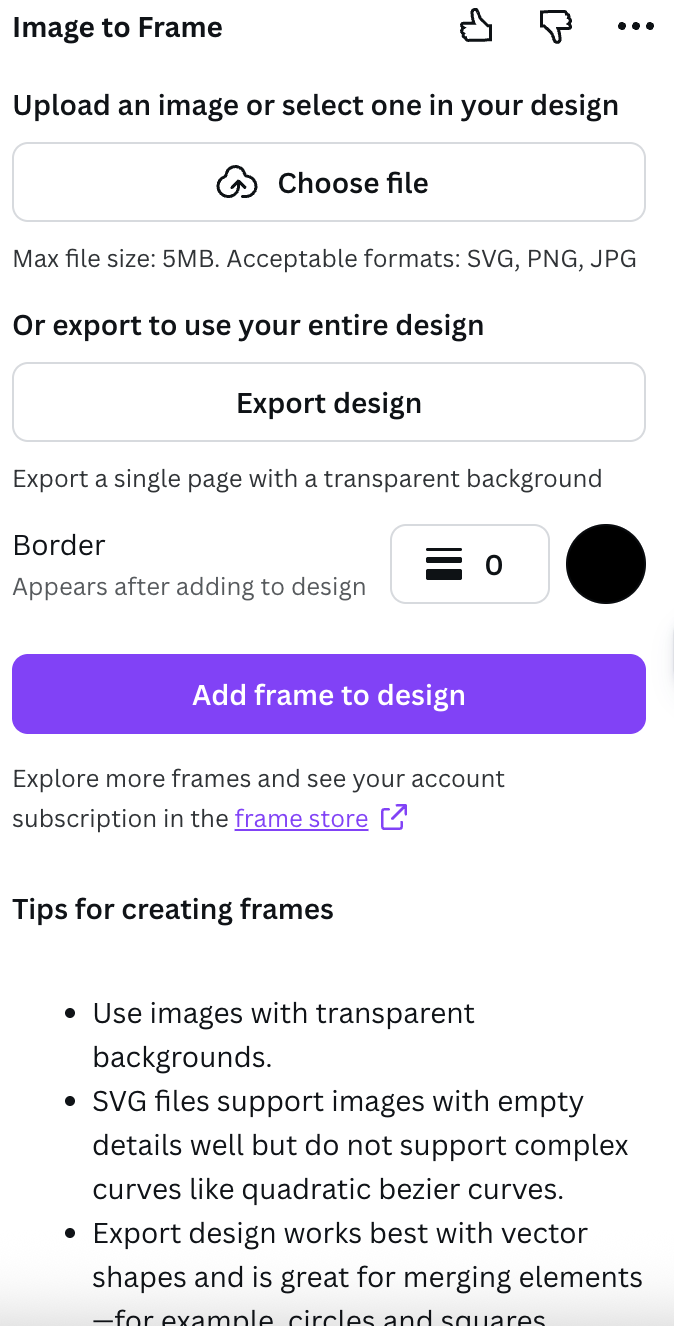
There is a third input path that saves a lot of grief here: instead of uploading a file, use Export design, which takes your current Canva page and exports it as a single transparent PNG. That is the right route when your shape is made of several separate elements — a circle, a square and some text arranged together — because it flattens them into one clean outline for you.
2. Your icon looks fine on screen and terrible in print #
Screen is roughly 72–96 dots per inch. Print wants around 300. A logo that looks crisp in your browser can be a quarter of the resolution a printer needs.
If you have an SVG, this problem does not exist — scale it as far as you like. If you only have a raster file, get the largest version you can find and check it at 100% zoom before you send anything to print. What you see at 100% is roughly what comes out of the printer.
3. Your downloaded design has a white box behind it #
You exported as JPG. Canva's download menu offers PNG with a Transparent background checkbox — that checkbox is a Canva Pro feature, and it only appears for PNG, never JPG. SVG download is also a Pro feature.
4. Photos inside letters look muddy #
Not a format problem exactly, but adjacent. When you fill text with photographs — the trick behind photo letters using Text to Frames — a busy photo inside a thin, elegant typeface reads as noise. Use a heavier font, and judge the result at 100% zoom rather than fitted-to-screen.
Which format for which job #
| You are making | Use | Why |
|---|---|---|
| A photo for a website or social post | JPG | Smallest file, and there is nothing to keep transparent |
| A photo you will edit repeatedly | PNG | JPG throws away a little quality every save |
| A logo to place over a coloured background | PNG (or SVG) | Needs the transparent alpha channel |
| A logo for print, signage or a cutting machine | SVG | Scales to any size with no quality loss |
| A source shape for a custom frame | SVG first, transparent PNG second | Exact outline, no background to trip it up |
| A screenshot with text in it | PNG | JPG compression smears fine text edges |
| A cut file for Cricut or a print shop | SVG | It is the format they ask for |
About converting between them #
Converters are everywhere and mostly honest about the easy directions. The hard direction is worth understanding.
SVG → PNG or JPG is straightforward. The recipe gets drawn once at a size you choose and frozen into pixels. Pick a generous size, because you cannot go back up afterwards.
PNG or JPG → SVG is not a conversion so much as a re-drawing. A tracing algorithm looks at your pixels, guesses where the edges are, and builds shapes to match. On a clean two-colour logo it works beautifully. On a photograph it produces a poster-ish approximation made of flat colour blobs — technically an SVG, but not your photo any more.
And crucially: tracing a JPG does not give you back a transparent background. The white was baked in; there is nothing to recover. Remove the background first, then trace.
What Canva already does well here #
Worth being straight about, because you may not need any extra app:
- Background Remover (Pro) is genuinely the most useful tool in this whole article. Most format problems are really background problems, and this solves them in one click.
- Download as PNG with Transparent background (Pro) exports clean cut-outs from any design.
- Elements → Frames gives you a free library of ready-made frames that work on desktop and mobile. If the shape you want is already in there, use it — no file, no format, no conversion.
- Canva reads SVG uploads fine, so a vector logo from your designer will drop straight in.
The apps become worth it when the shape you need is not in Canva's library: your own logo, a scanned signature, a hand-drawn silhouette, a map outline. That is the gap Image to Frame fills, and it is also why AI Frames exists for when you have no file at all and only a description.
Five habits that prevent most of this #
- Ask for SVG when someone sends you a logo. It costs them nothing and solves every future scaling problem in one go.
- Remove backgrounds before converting anything, not after. Every downstream step gets easier.
- Never save a working file as JPG twice. JPG compression is lossy and cumulative — each save degrades the last one slightly.
- Set your Canva page to the real physical size early if the design is going to be printed. App-generated frames scale to whatever page is open.
- Check at 100% zoom before exporting. Fitted-to-screen hides exactly the softness that print exposes.
Related reading #
- What Is a Frame in Canva? — the concept, and how frames differ from grids and masks
- Canva Frame Not Working? 9 Fixes — the troubleshooting companion to this article
- Image to Frame vs Clipping Mask — reusable frame vs one-off cut-out
- What Is a Photo Border? — borders, frames and masks compared
Frequently asked questions
A PNG is a grid of pixels. An SVG is a set of instructions for drawing shapes — lines, curves and fills — that get redrawn at whatever size you display them. That means an SVG stays perfectly sharp at any scale, while a PNG gets soft and blocky if you enlarge it past its native size. Both can have transparent areas. The trade-off: PNG can hold a photograph, SVG cannot (it is meant for flat artwork like logos, icons and lettering).
Because the file you uploaded still has a background. A frame is cut from the transparent outline of your file — if the shape sits on a white or coloured background, the outline the app sees is the rectangle of the whole image. Remove the background first and save as PNG or SVG. A JPG will always do this, because the JPG format has no way to store transparency at all.
SVG first if you have it — it is exact, tiny, and describes the shape rather than approximating it. Otherwise a PNG with a genuinely transparent background. JPG works as a file type but only ever produces a rectangular frame, so it is not worth using for this. All three are accepted up to 5MB per file.
Not really, and this is where most converter sites oversell. Converting a photo to SVG runs a tracing process that guesses at edges and turns your image into flat blocks of colour — it does not recover a background that was never stored. If you need a shape from a photo, remove the background and keep it as a PNG, or redraw the shape properly. Tracing is for simple flat artwork like a scanned logo, not portraits.
Related products


More from QRdy Blog
Word Calendar Template vs Canva Calendar Maker: Which Should You Use?
Microsoft Word calendar templates are fast and familiar; Canva's Calendar Maker app is built for good-looking, printable calendars. Here is an honest side-by-side, with a clear verdict for each use case.
The Best Canva Apps for Invitations (2026): Birthday, Baby Shower & Party
Canva's invitation templates get you 80% of the way. These Canva apps cover the rest: custom photo shapes, monogram letters, borders, palettes and RSVP QR codes.
How to Put a Photo in a Heart Shape in Canva (3 Easy Ways)
Want a heart-shaped photo in Canva? Use the built-in heart frame, turn any heart graphic into a custom frame with Image to Frame or Frames Lab, or build a heart collage. Step-by-step for each.