
How to Make a Torn Paper Effect on a Photo in Canva
Give any photo ripped, torn paper edges in Canva: the quick built-in way with a torn paper frame, plus how to turn any torn paper graphic into your own frame with a white paper border.
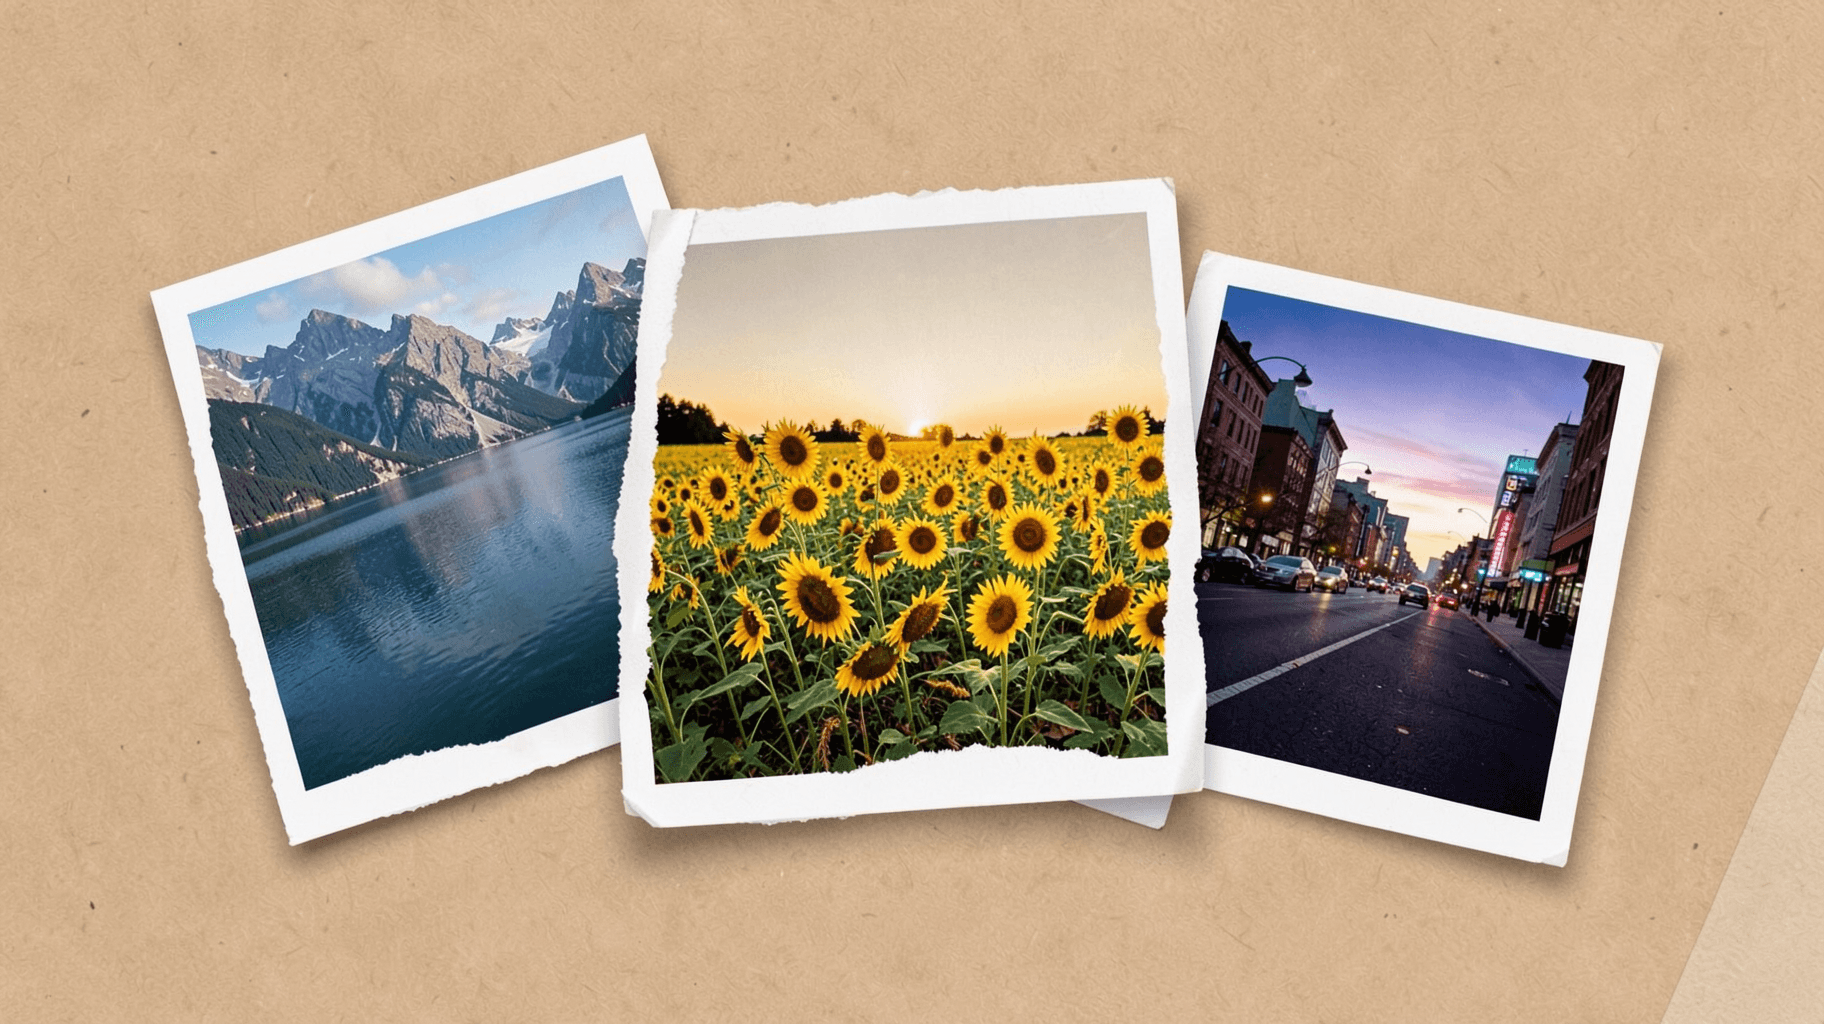
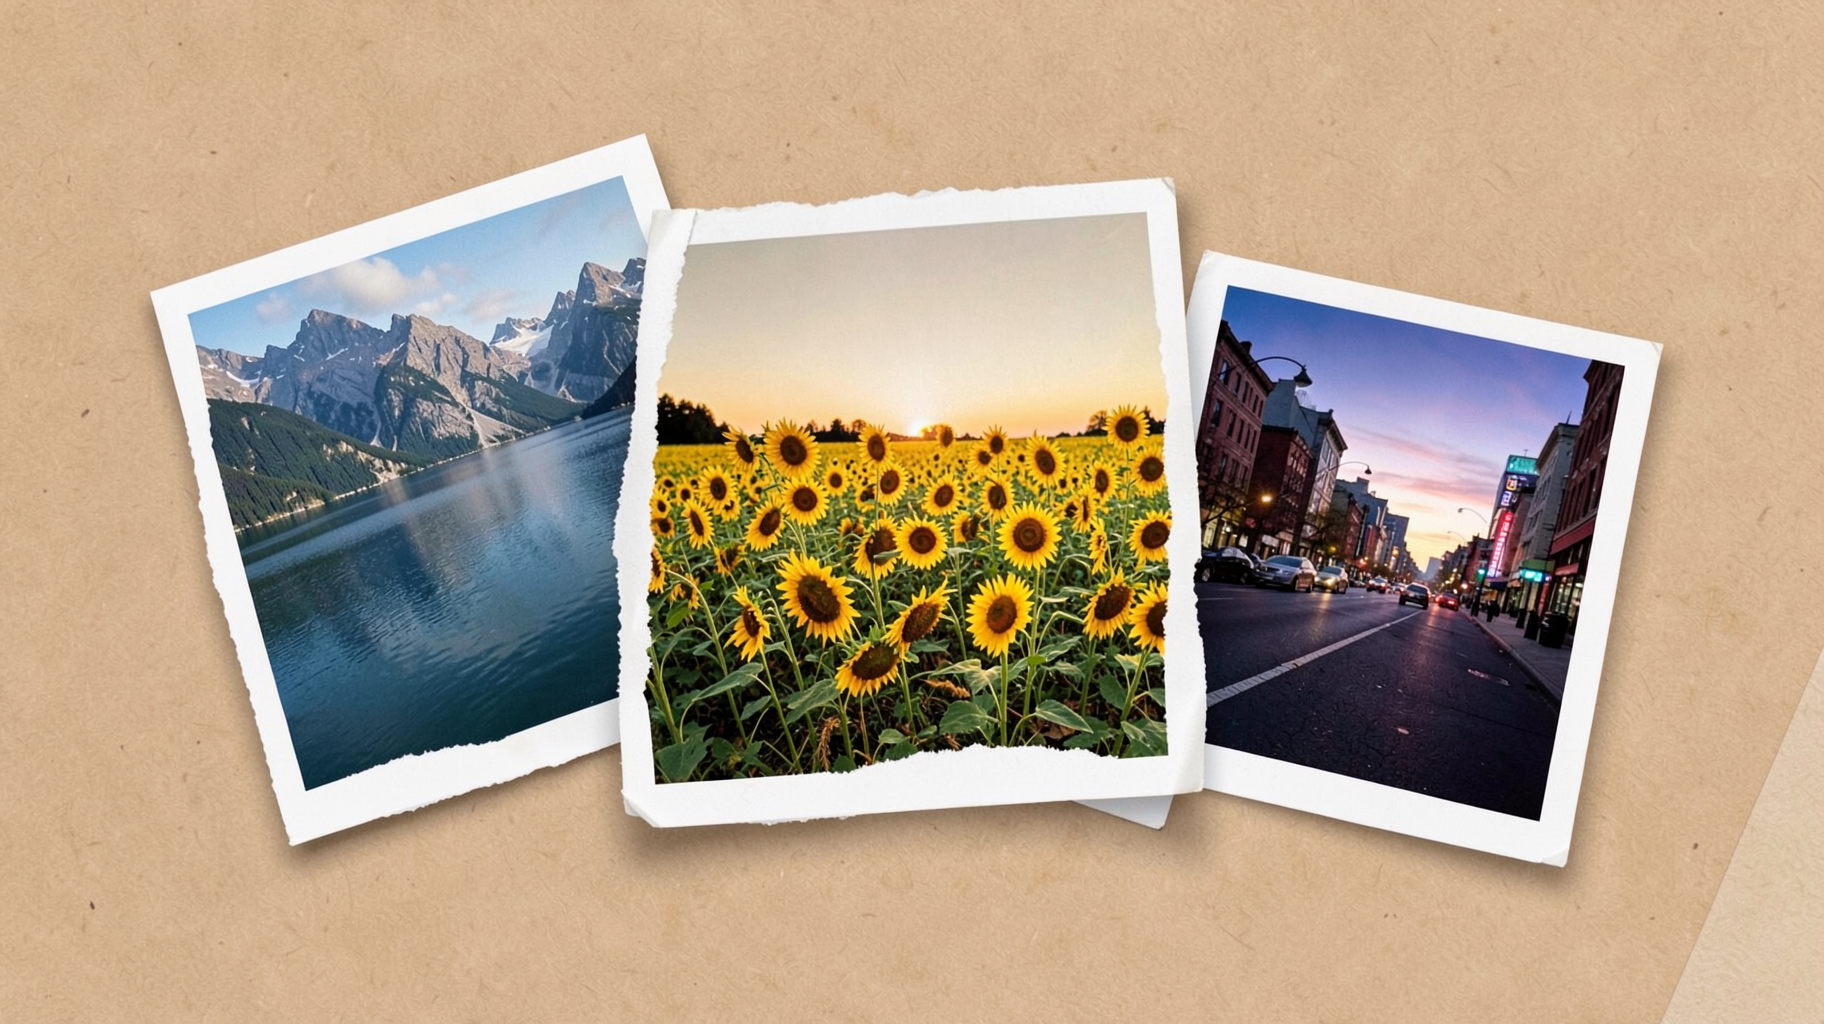
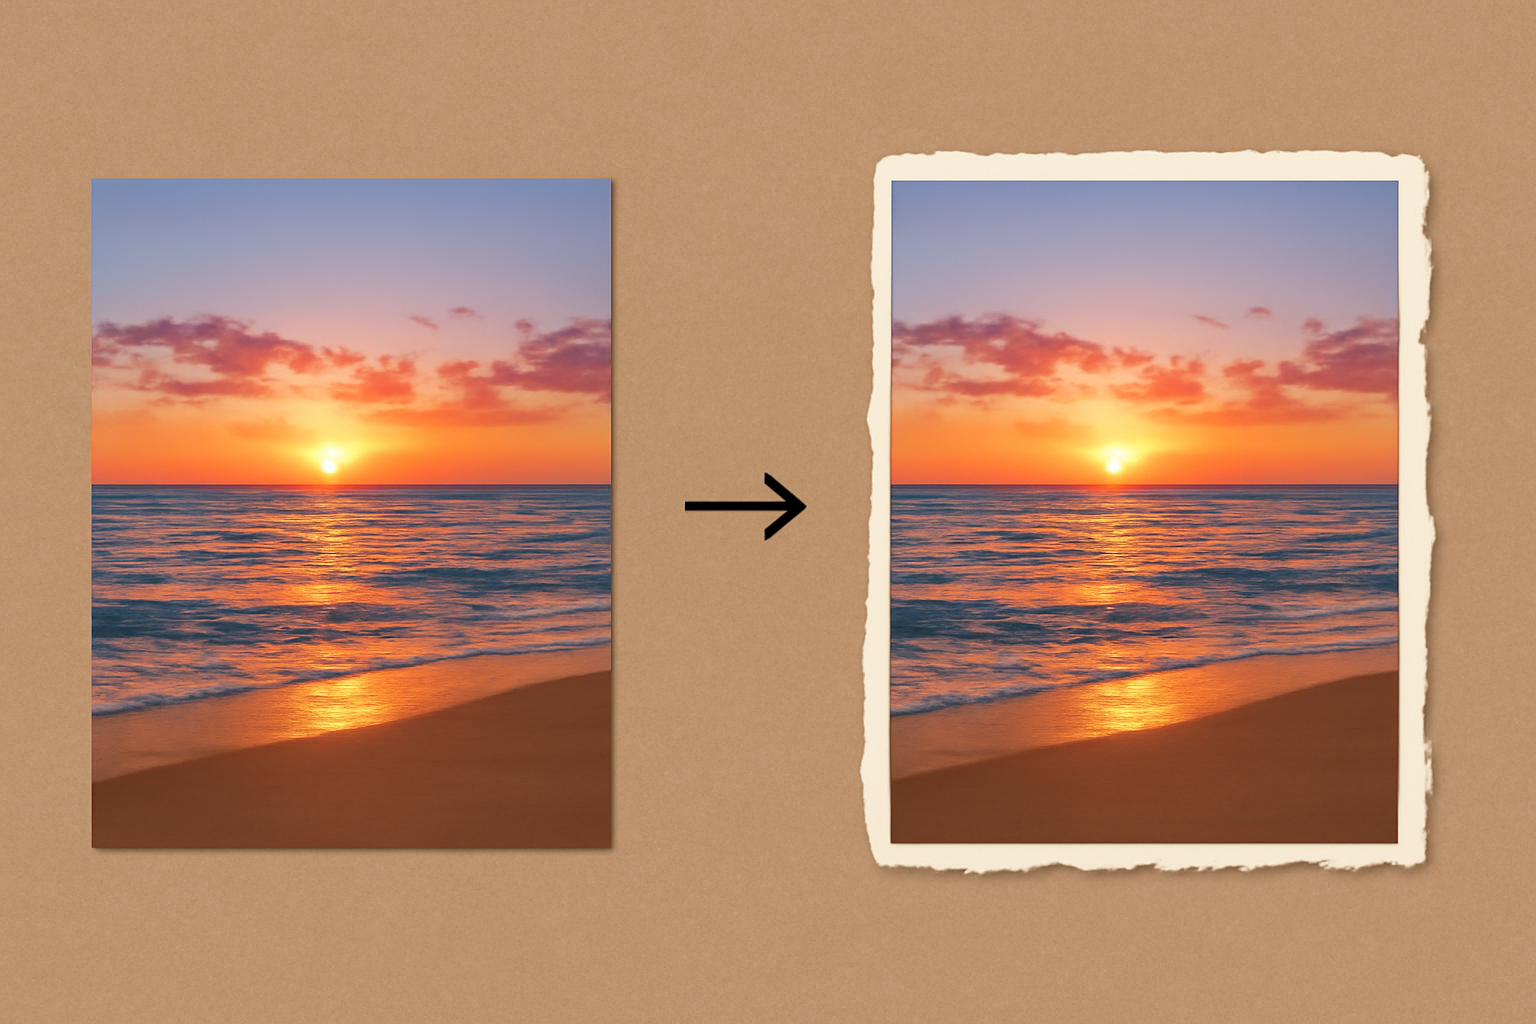
To make a torn paper effect on a photo in Canva, open Elements, search "torn paper frame", add a frame and drag your photo onto it. The photo is cropped to the ripped edge. If the torn shape you want is only a graphic, convert it into a frame with Image to Frame, add a white border, then drop the photo in.
That is the short version. Below are the exact clicks for both routes, how to get the white "paper" rim that makes the effect look real, and what to do when the photo refuses to go inside the shape.
What "mask the photo" actually means in Canva #
Most torn paper tutorials say "now mask the photo" and move on. Canva has no button called Mask. In Canva, a mask is a frame: a shape that crops whatever photo or video you drop into it.
So the whole effect comes down to one thing: getting a frame with a torn outline. There are two ways to get one.
Method 1: Use a torn paper frame from Elements #
Start here. It is built in and takes about a minute.
- Open your design and click Elements in the left sidebar.
- Search for torn paper frame (also try ripped paper frame).
- Scroll to the Frames section of the results and click See all.
- Click a frame to add it to your page. Frames show a placeholder picture, usually a sky and hills, which is how you tell them apart from plain graphics.
- Drag your photo from Uploads onto the frame. It snaps inside and takes the torn edge.
- Double-click the frame to reposition or zoom the photo inside it, then click Done.
Tip: elements marked with a crown need Canva Pro. There are free torn frames too, so keep scrolling.
This method is enough when one of Canva's frames already matches the look you want. It runs out when:
- the tear shape you like shows up under Graphics, not Frames, so photos just sit on top of it
- you want a white or cream paper rim around the photo
- you want a specific tear, such as a newspaper clipping shape or a strip torn on one side only
Method 2: Turn any torn paper graphic into a frame #
Image to Frame is a Canva app that converts an image into a real Canva frame. It can read an image that is already on your page, so any torn paper graphic you find in Elements can become your mask.
- In Elements, search torn paper and open Graphics. Add a solid torn piece of paper to your page. Pick one with a clean, filled shape and a transparent background.
- Stretch it to roughly the proportions you want the finished photo to have.
- Click Apps in the sidebar, search for Image to Frame and open it.
- Click the torn paper graphic on your page. The app detects the selected image and shows a Preview of the frame.
- Under Border, drag the thickness slider to somewhere between 8 and 20 and set the colour to white or cream. This becomes the paper edge.
- Click Add frame to design.
- Drag your photo into the new frame.
- Delete or hide the original graphic.
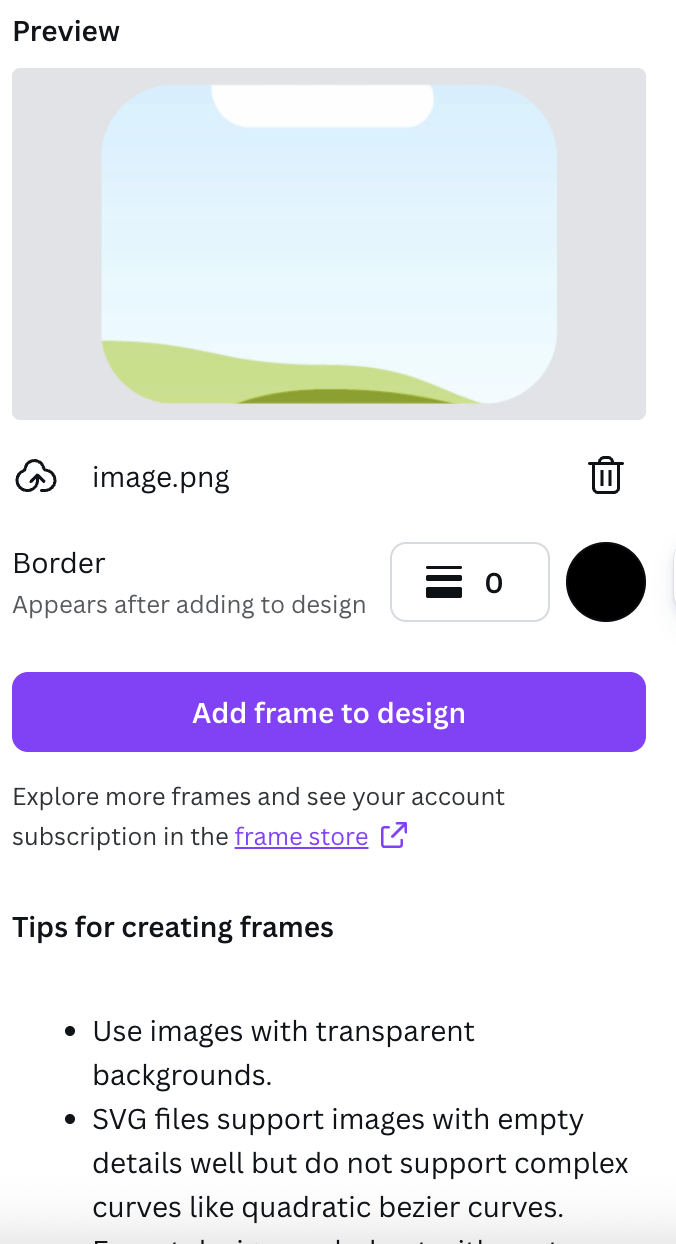
The border does not show in the preview. The app notes "Appears after adding to design" under the control. Set the value, add the frame, and the white rim will be there on the canvas.
Open Image to Frame in Canva to try it on your own torn paper shape. Image to Frame is a Pro app with a trial, and it is free for students and teachers.
You can also upload your own torn shape instead of using a Canva graphic: scan a real ripped sheet, remove the background, and upload the PNG (PNG, SVG or JPG, up to 5MB).
Method 3: Build a newspaper clipping shape #
For a clipping that is straight on three sides and torn on one, no single graphic will fit. Build the shape, then convert the whole page.
- Add a blank page to your design.
- Add a rectangle from Elements > Shapes and colour it black.
- Add a torn paper strip graphic, colour it black if the element allows, and overlap it along one edge of the rectangle so the two read as one silhouette.
- Open Image to Frame and click Export design. Export only that one page. The app accepts a single page as a PNG with a transparent background.
- Set a Border if you want a paper rim, then click Add frame to design.
- Move the new frame to your real page and drop the photo in.
Keep the page background empty. Anything left on the page becomes part of the frame.
Finishing touches that sell the effect #
- Rotate each piece a few degrees. Perfectly level torn photos look digital.
- Use an off-white border, not pure white, on light backgrounds so the rim stays visible.
- Add a paper background. Search Elements for "newsprint" or "kraft paper" and send it to the back.
- Fake a shadow. Duplicate the torn graphic, make it dark grey, lower its transparency, nudge it a few pixels down and right, and send it behind the frame.
- Overlap several clippings. For a tidy starting layout, Frames Lab's Grid and Diagonal modes give you evenly spaced frames to arrange around your torn pieces. See how to make a photo collage in Canva.
If it doesn't work #
- The photo lands on top of the torn paper. You added a graphic, not a frame. Use Method 2 to convert it.
- The frame came out as a rectangle. The source image had a solid background. Use a transparent one, or remove the background first.
- No border after adding the frame. Check that the thickness is not still at 0, and that the border colour is not the same as your page colour.
- The app says the image can't be converted. Very fine, fibrous tears can be too intricate. Pick a torn graphic with a simpler edge, or get a ready-made frame from the app's Frame Store.
- File rejected. Uploads are limited to 5MB.
- Export design fails. Export a single page only.
- The torn edge looks jagged when enlarged. Convert a larger version of the graphic and add the frame again, instead of stretching a small frame.
If photos refuse to drop into any frame at all, work through Canva frame not working: 9 fixes. To change the rim later, see how to add a border to a frame in Canva.
Which method should you use? #
| You want | Use |
|---|---|
| A quick torn edge, any style | A torn paper frame from Elements |
| A specific torn graphic as the mask | Image to Frame, select the graphic |
| A white or cream paper rim | Image to Frame with Border 8 to 20 |
| A clipping torn on one side only | Build the shape, then Export design |
| Your own real ripped paper | Scan it, remove the background, upload |
Try Canva's built-in torn frames first. Move to Image to Frame when the tear you want is only a graphic, or when you need the paper border.
Frequently asked questions
In Canva, masking a photo means putting it inside a frame. Add a torn paper frame from Elements, then drag your photo onto it and the photo is cropped to the ripped edge. If the torn paper element you like is a graphic and not a frame, convert it with Image to Frame first, then drop the photo into the frame it creates.
The torn paper element is a graphic, not a frame. Only frames accept a dropped photo. Either pick an element from the Frames section of Elements, or select the graphic in Image to Frame and click Add frame to design to get a frame with the same torn outline.
In Image to Frame, set the Border thickness to roughly 8 to 20 and choose white or cream as the border colour before you click Add frame to design. The border follows the torn outline. It does not show in the app preview and appears once the frame is on your page.
Yes. A frame made with Image to Frame is a normal Canva frame, so you can drag a video into it the same way you drag a photo. The video plays inside the torn paper outline.
The source image had a solid background, so the app traced the whole rectangle. Use a torn paper graphic with a transparent background, or remove the background first, then convert it again.
Related products

More from QRdy Blog
Printful Mockup Generator vs Your Own Product Photos: How to Get Custom Mockups Into Printful Listings
Printful's free mockup generator is great for variants and size. Here's when your own sample photos are worth it, and a 5-step workflow to turn one photo into mockups for every design and add them to your Etsy or Shopify listings.
What Is a Smart Object in Photoshop? (And Why Every Mockup PSD Uses One)
A smart object is a Photoshop layer that protects the original image while you scale, warp, and filter it. Here's why every mockup PSD is built around one, how to edit it, and how to fix the "not directly editable" error.
How to Round Corners in Canva (Photos, Shapes, Frames and Collage Grids)
Round the corners of a photo, video or shape in Canva with the Corners button, then see what to do when it is missing: frames, collage grids and text boxes, with exact clicks for each.