
How to Make a Family Tree in Canva (With Photos, Step by Step)
A practical walkthrough for building a photo family tree in Canva — how to lay out generations, which frame shape to use for each photo, and how to turn any shape (even a hand-drawn tree) into a real Canva frame you can drop photos into.
A family tree is one of those projects that sounds simple until you open a blank canvas. The information is easy — you know who goes where. The hard part is the layout: getting three generations to sit evenly, keeping the photos the same size, and making the whole thing readable from across a room.
Canva handles most of this well. The one place it fights you is the photo slots. Below is the full build, including the workaround for putting a photo inside a shape Canva doesn't offer.

Before you open Canva: decide three things #
Five minutes here saves an hour of rearranging later.
How many generations. Three (grandparents → parents → children) is the sweet spot for a single page. Four works on a poster. Past that, the bottom row gets so wide the names shrink to nothing — most people split into two charts, one per side of the family.
Which direction it grows. Top-down (oldest at the top) is the standard chart format and the easiest to read. Bottom-up, with a literal tree trunk and branches, looks lovely but is much harder to keep balanced — every branch has to carry a different number of people.
The final size. Set this before you place a single element. A3 (11.7 × 16.5 in) fits three generations comfortably. Go A2 or 18 × 24 in for four generations or a wall piece. Building at 1080 × 1080 and scaling up afterwards is how you end up with blurry faces.
Step 1 — Set up the canvas #
In Canva, Create a design → Custom size, then enter your print size in inches or millimetres rather than pixels. Canva sets print files to the right resolution automatically when you work in physical units.
If a print shop is trimming the final piece, turn on File → Settings → Show print bleed and keep nothing important within about 3 mm of the edge. (If bleed and trim are new terms, we explained them here.)
Step 2 — Block out the structure before adding anything pretty #
Place plain circles from Elements → Shapes as stand-ins — one per person — and arrange them into rows. Don't style anything yet.
Two Canva features do the heavy lifting:
- Select a row → Position → Align → Space evenly horizontally. This is the single biggest difference between a tidy chart and a wonky one.
- Elements → Lines for the connectors. Use elbow-style lines and snap them to the shape edges; Canva shows pink guides when they lock on.
Get the skeleton right while everything is still a grey circle. Once photos are in, nudging things becomes fiddly.
Step 3 — Choose one frame shape and stick to it #
Mixing circles, squares and hearts on the same chart reads as clutter. Pick one shape per generation at most — for example ovals for the grandparents' row and circles for everyone below.
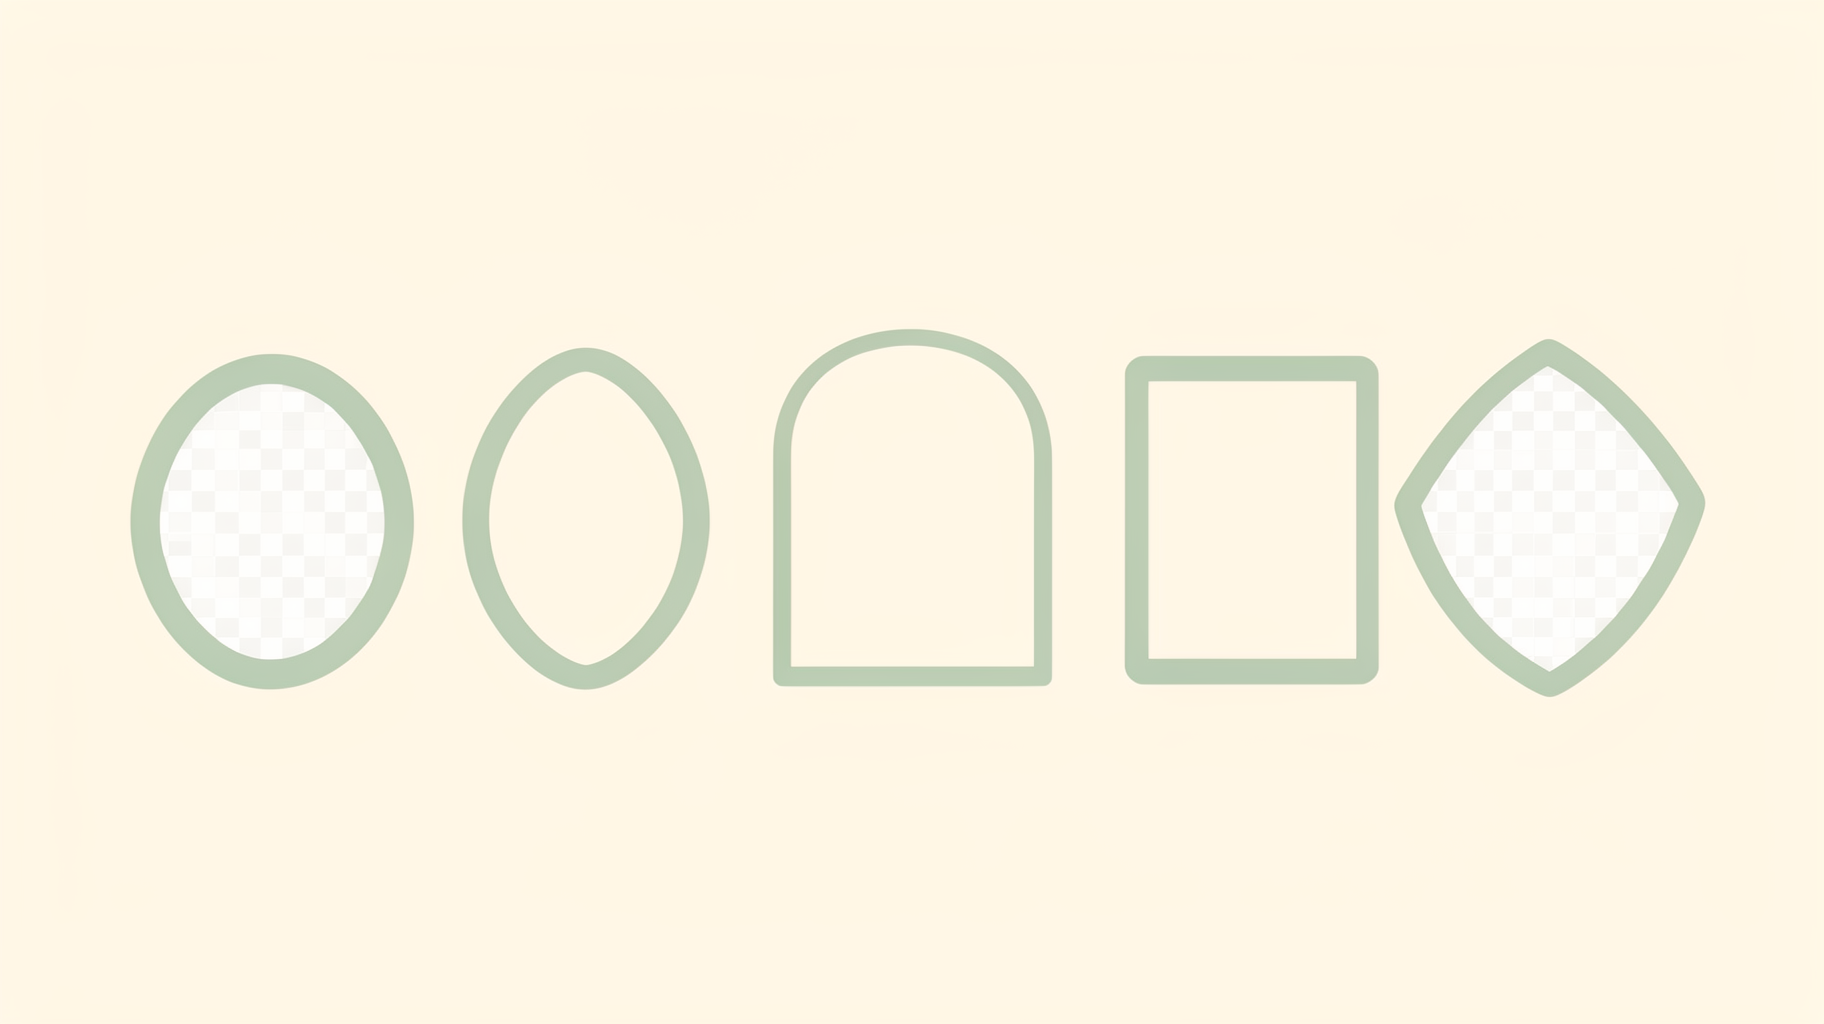
What each shape does to a family tree:
| Shape | Best for | Watch out for |
|---|---|---|
| Circle | Modern charts, headshots | Crops hair and shoulders tightly |
| Oval | Vintage / heritage look | Needs portrait-orientation photos |
| Arch | Warm, gallery-wall feel | Looks odd at very small sizes |
| Rounded square | Group photos, wide crops | Can feel like a corporate org chart |
| Leaf / custom | Literal tree designs | Not available as a built-in Canva frame |
Step 4 — The free route: Canva's built-in frames #
Go to Elements → Frames and drag a circle or square frame onto each position, then drop a photo straight onto it. Canva fills the frame and crops automatically; double-click to reposition the photo inside.
This is genuinely all most people need, and it costs nothing. Its limit is the shape list — Canva's frame collection is decent but finite, and "a leaf", "an oval with a scalloped edge" or "our actual family crest" are not in it. Frames also behave differently from grids and gridlines, which trips people up constantly; the difference is worth a two-minute read if you've ever wondered why a photo snapped somewhere unexpected.
Step 5 — Custom shapes: turn any image into a frame #
Here's the trick that unlocks the leaf-shaped, crest-shaped or whole-tree-shaped version.
Canva can't make a frame out of an arbitrary shape, but Image to Frame — an app that runs inside the Canva editor — can. It converts a PNG, SVG or JPG (up to 5 MB) into a real Canva frame you then drag photos into like any other.
The critical part is the source image. It must have a transparent background:

A flat silhouette like the one above converts cleanly, because the app traces the outline of the non-transparent pixels. Feed it a shape sitting on a white background and you'll get a rectangle back — the white is part of the image as far as the tracer is concerned. Remove the background first (Canva Pro's background remover, or any cutout tool) and the frame will hug the real edge.
The workflow:
- Open Image to Frame from the Apps tab in the Canva side panel.
- Give it your shape in one of three ways: upload a file, click an image already sitting on your page, or use Export design to flatten the current page into a single transparent PNG. That third option is the clever one — you can group several circles and a connector line, export them together, and get one multi-slot frame back.
- Check the preview. If it isn't what you expected, clear it and try a different source file.
- Set a border if you want one — thickness runs 0 to 50, plus a colour picker. Note that the border only appears after the frame lands in your design, not in the preview.
- Click Add frame to design, then drag a photo into it.
The result, with a photo (or a texture) dropped in:

There's also a Frame Store inside the app if you'd rather grab a ready-made shape than prepare your own. Very intricate outlines — lots of thin overlapping curves — sometimes fail to convert; simplify the shape or pick a different file if that happens.
Step 6 — For a modern, chart-style tree: grid frames #
If you'd rather have a clean grid of portraits than a branching diagram, Frames Lab builds multi-cell frames to spec. Its Create → Grid mode lets you set columns, rows and the gap between cells, then drops the whole grid in as one object that auto-fits your page size. Arc mode curves a row of photo slots, which works nicely as a header above the chart.
Two practical notes: keep grids under roughly 30 cells (larger layouts get rejected), and if you use Shape mode to convert something already on your canvas, press Recheck design after every edit so the app sees the current version.
Step 7 — Names, dates and hierarchy #
Type is where most family trees fall apart. A few rules that hold up:
- Two text sizes, maximum. Name at one size, dates at a smaller size in a lighter grey. That's it.
- Left-align or centre-align consistently. Centred under a circular photo, left-aligned beside a square one.
- Set your name text once, then copy-paste it for every person. Retyping means inconsistent sizes.
- Keep the oldest generation's names slightly larger if you want to signal hierarchy without drawing a bigger box.
For a decorative family name across the top, Text to Frames can fill each letter with a different photo — a nice touch on a memorial or anniversary piece, though it's easy to overdo on a chart that already has thirty faces on it.
Step 8 — Add photos, then fix the crops #
Drag each photo onto its frame. Then go back through and double-click every single one to adjust the crop. Canva centres the image by default, which rarely puts a face where you want it — especially in ovals and arches.
Aim for consistency: same amount of headroom, similar head size, faces roughly at the same height within each frame. This matters more than photo quality. Ten mismatched crops look worse than ten slightly grainy scans.
If you're working with old scanned photos, check they're at least 1000 px on the short edge before printing large. Canva flags low-resolution images with a warning triangle at download time.
Step 9 — Export #
- Printing at home or a shop: PDF Print, with crop marks and bleed if the shop asked for them.
- Sharing digitally: PNG, and tick Transparent background only if you're placing it onto something else.
- Sending to family: PDF Standard keeps the file small enough to email.
Five mistakes worth avoiding #
- Building small and scaling up. Start at final print size.
- Photos on white backgrounds fed into a frame converter. Remove the background first, every time.
- Eyeballing the spacing. Use Align → Space evenly. Your eye is not as good as you think.
- Too many decorative elements. Leaves, vines and flourishes compete with the faces. Pick one accent and repeat it.
- Forgetting maiden names. Whoever inherits this chart in forty years will thank you.
A realistic time estimate #
Structure and layout: 20 minutes. Sourcing and cropping photos: usually the longest part, and entirely dependent on how organised your family's photo archive is. Styling and export: 15 minutes.
The photo hunt is the real project. The Canva part is the easy bit — especially once you know that any shape you can draw can become a frame.
Frequently asked questions
Yes — search "family tree" in Canva's template search and you will find a good number of editable charts, many of them free. They are a fine starting point for the structure. Where they tend to fall short is the photo slots: most use plain circles or squares, and swapping those for a shape of your own (an oval, an arch, a leaf, a hand-drawn tree) is the part you have to do yourself.
Three is the sweet spot for a one-page printed chart: grandparents, parents, children. Four generations still fits on a large poster (A2 or 18x24 in) if you shrink the photos on the oldest row. Beyond four, most people split into two charts — one per side of the family — because the bottom row gets too wide to read.
Not with a plain shape from Elements — dropping a photo onto a shape in Canva recolours or sits behind it rather than filling it. You need a frame. Canva's built-in frames cover circles, squares and a handful of decorative outlines; for a specific shape like a leaf or a whole tree silhouette, convert a transparent PNG of that shape into a frame first with an app like Image to Frame, then drag your photo in.
A3 (11.7x16.5 in) handles three generations comfortably and still fits most home printers' paper sizes at a print shop. Go to A2 or 18x24 in for four generations or for a wall piece. Set the design up at the final print size from the start rather than scaling up later, and add bleed if a print shop is trimming it.
Related products


More from QRdy Blog
10 Photo Collage Ideas You Can Make in Canva (Grids, Arcs, Diagonals and More)
Ten photo collage ideas you can build in Canva, from classic grids and rainbow arcs to diagonal strips and sunburst layouts, with honest notes on when Canva's built-in grids are enough.

Canva Monthly Calendar: Template vs Table vs Calendar Maker (Which Is Fastest?)
Three ways to make a monthly calendar in Canva: a ready-made template, a hand-built table, or the Calendar Maker app. We compare setup time, flexibility and 12-month projects, with a clear verdict.
How to Make a Hat Mockup From a Photo (So the Design Curves With the Cap)
Turn one photo of a blank cap into realistic hat mockups: drag a box around the front panel, let the design wrap the curve with the photo's real shading, then render all your designs at once in your browser.