
How to Outline Text in Canva (3 Ways, Including Outlined Photo Letters)
Learn how to outline text in Canva with the built-in Outline effect, a stacked-copy trick for thick borders, and Text to Frames for outlined letters filled with photos.

Outlined text is one of the quickest ways to make a headline readable on a busy photo. Canva gives you a built-in outline, but it has limits: the stroke can be thin, and it does not work on letters filled with a photo. This guide covers three ways to outline text in Canva, from the one-click method to outlined photo letters, so you can pick the one that fits your design.

Quick pick: which method should you use? #
| Method | Best for | Thickness | Works with photo-filled letters |
|---|---|---|---|
| Canva Outline / Hollow effect | Fast headline outlines | Thin to medium | No |
| Stacked-copy trick | Thick, bold borders | Any | No |
| Text to Frames (Border effect) | Outlined photo letters | Slider-based | Yes |
Method 1: Use Canva's built-in Outline effect #
This is the fastest option and needs no apps.
- Add a text box and type your words.
- With the text selected, click Effects in the top toolbar.
- Choose Hollow for an outline-only look, or Outline if it appears in your Effects list for a filled-plus-outlined look.
- Use the sliders to set the thickness and pick a stroke color.
Tip: choose a stroke color with strong contrast against both the text fill and the background. White text with a dark outline stays readable on almost any photo.
Method 2: Stack a thick copy behind the text #
When the built-in outline is too thin, build your own border with two layers.
- Type your text and pick a bold font.
- Duplicate the text box (Ctrl/Cmd + D).
- On the back copy, apply Hollow and push the thickness up, or set it to a solid dark color and apply Outline at the maximum value.
- Drag the front copy exactly on top of the back copy, then select both and use Position to align them center.
- Group the two layers so they move together.
Tip: use the same font and size for both copies. Even a one-pixel size difference makes the border look uneven.
Method 3: Outline photo-filled letters with Text to Frames #
Canva's text effects cannot outline letters that hold a photo, because the photo fill is a separate layer. Text to Frames solves this: it turns each letter into a real Canva frame, so you can drop a photo in and add an outline in the same step.
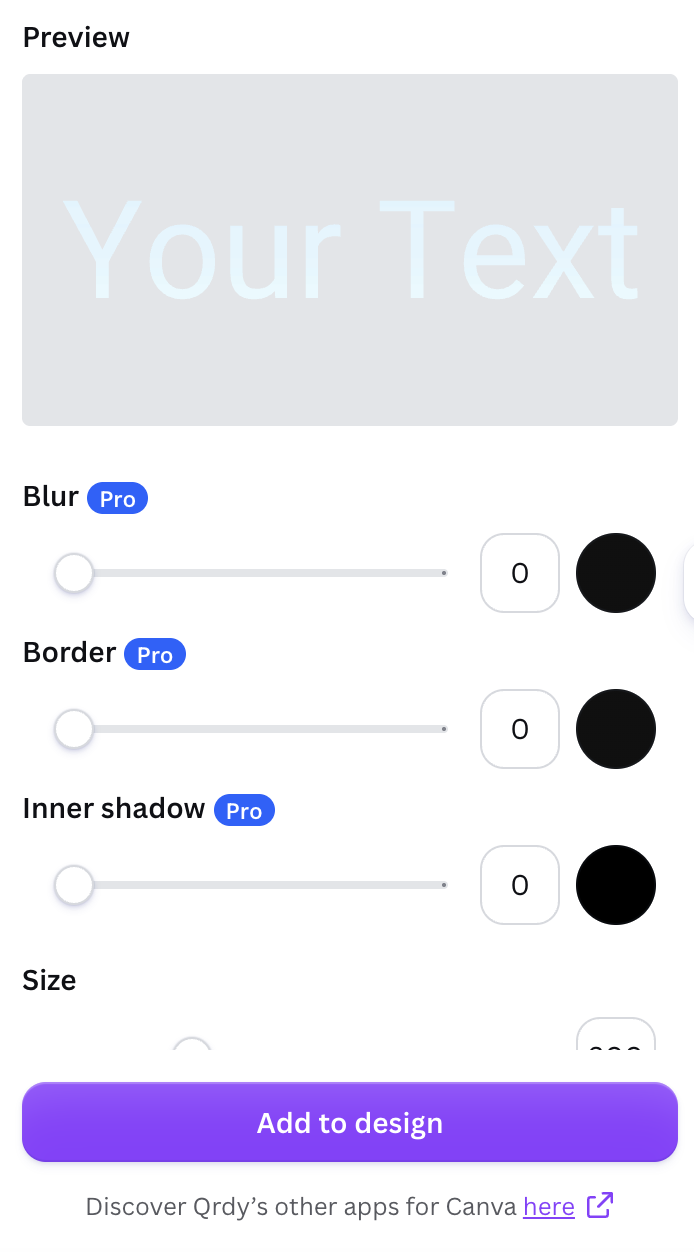
- In Canva, open a design, go to Apps, and open Text to Frames.
- Type your text (up to 200 characters) and choose a font. The free plan includes Roboto, Open Sans, Lato, Playfair Display and Pacifico; Pro unlocks 100+ fonts.
- Turn on the Border effect and drag the slider (0 to 50) to set the outline thickness. Pick a border color.
- Optional: add Blur (a glow behind the letters, 0 to 20) or Inner shadow (depth inside the letters, 0 to 40). The three effects stack, with Blur and Border behind the letters and Inner shadow on top.
- Check the Preview. It shows exactly what will be added to your design.
- Click Add to design, then drag a photo into the letter frames. Drag inside a letter to reposition the photo.
- Turn on Split into letters first if you want a different photo in each letter.
Note: Border, Blur, Inner shadow and the extended font list are Pro features. On the free plan the main button changes to "Try Text to Frames Pro" when you enable one.

Which should you choose? #
If you only need a readable headline, Canva's built-in effect is enough and free. If you need a chunky sticker-style border, the stacked-copy trick works in any plan. If you want photo letters with a clean outline, glow or depth, Text to Frames is the only one of the three that does it in a single step, though the effects need Pro. For a single photo across a whole word instead of per letter, Clipping Mask is the related option.
Common problems #
- Outline looks jagged: use a larger text size and scale down afterward rather than a tiny size with a thick stroke.
- Outline covers the letter counters (the holes in A, O, B): reduce thickness, since a thick stroke fills the gaps.
- Text to Frames says the text is too long: shorten the text or reduce the font size.
- "Frames can't be added to this design type": open the app in another design type such as Poster, Presentation or Instagram Post.
Frequently asked questions
Select your text box, open Effects in the top toolbar, and choose Outline (under Shadows or Lift/Hollow depending on your layout). Adjust thickness and pick a color. For a thicker border or an outlined photo-filled letter, use the stacked-copy trick or Text to Frames.
Yes. Use the Hollow effect for an outline-only look, or the Outline effect and set the text color to match the background. Hollow gives you thin outlines only, so for thick ones stack a thick-stroke copy behind the text.
Canva's Outline effect applies to normal text. For photo-filled letters, Text to Frames makes each letter a real Canva frame and offers a Border effect (Pro) that draws an outline around each letter shape, plus Blur and Inner shadow.
The free version includes 5 fonts and the core text-to-frame conversion. The Blur, Border and Inner shadow effects, plus the larger font library, are part of the Pro plan.
Related products


More from QRdy Blog
How to Take Product Photos for Etsy With Your Phone (That Also Work as Mockup Templates)
Window light, rear camera at 1x, a clean print area and one untouched shot: an 8-step phone photo routine for Etsy sellers, plus how to shoot blank products so the same photos become reusable mockup templates.

What Is an Alpha Channel? Meaning, File Formats, and Why It Matters for Canva Frames
An alpha channel stores how opaque each pixel is. Learn how it works, which formats support it (PNG, WebP, not JPG), and why it lets a Canva frame follow your real shape.
How to Make a Mockup in Photoshop (Smart Object Steps) — Plus a Faster Way From a Plain Photo
Step-by-step: use a mockup PSD's smart object, or build your own Photoshop mockup from a product photo with Warp, Multiply and a displacement map. Plus when a plain-photo tool is faster for bulk.